This method below can also be used on 18 carat palladium based white golds and with a steady hand and some experience 18 carat yellow too. (in the case of golds ignore the warning against using flux)
[edit] Added clip of actual fuse.
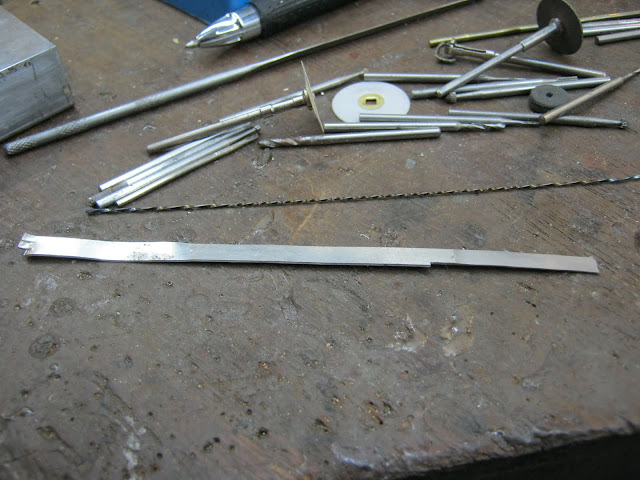
Preparing your platinum:
Cleaning, cleaning, cleaning..
this cannot be overstated. Dirt and saw teeth and file teeth and other detritis from rolling will make their way into the join area and also the metal area around the join. At the extreme temperatures required to do a fuse these polutants will destroy surface adhesion and also affect the "flow" of the metal, and this is amplified in the case of soldering instead of fusing.
I like to do all my papering and sawing and other preperation then soak my join in h2so4 for about 10 minutes and give a good scrub with a brush then steam my joint.. just for kicks. (Back when i was a platinazi I was known to soak it in nitric too.. jsut in case...
Once we have determined that our work area is clean lets move onto the actual fuse process.
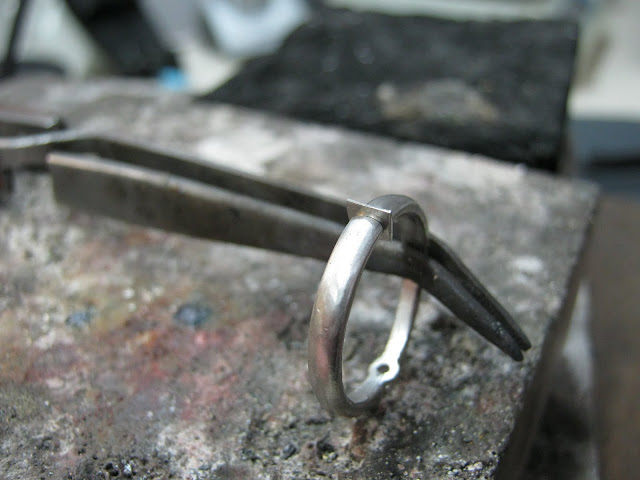
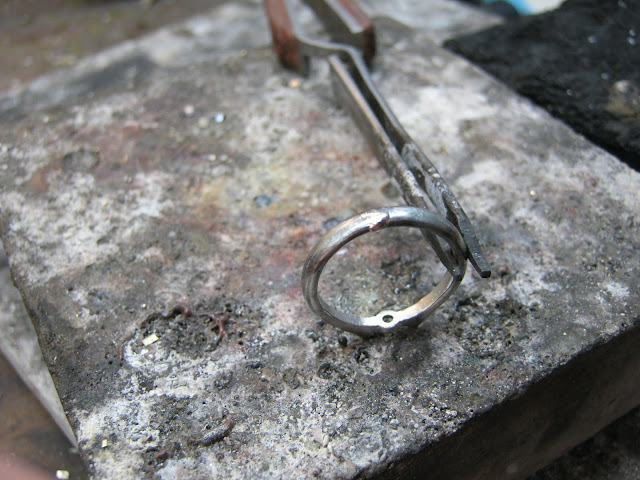
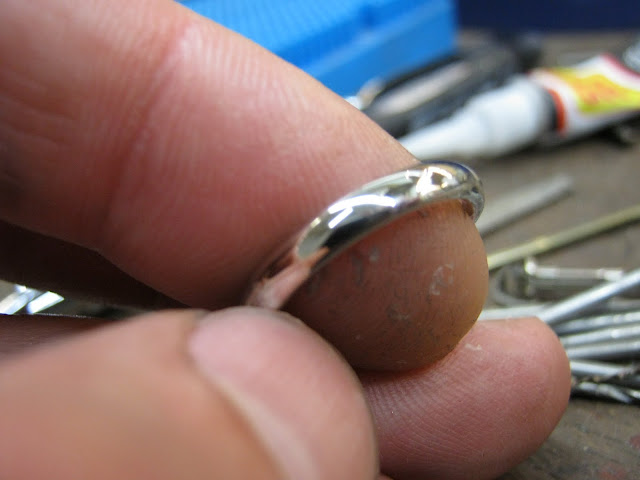
1: The ring. In this case I am assembling a cast piece with a hand made collet and I want my shank sized before the time. I prefer a fuse because it does not leave a line or run the risk of breaking after the ring is finished, or the line "wearing in" or polishing in after some time (or worse yet the join mysteriously just jumping open as the platinum age hardens (ruthenium))
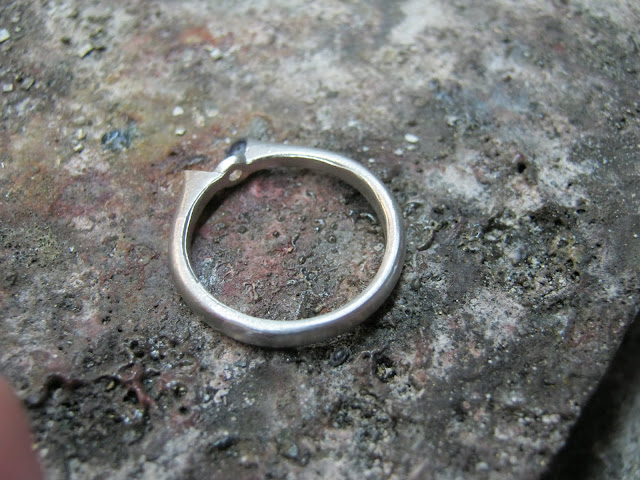
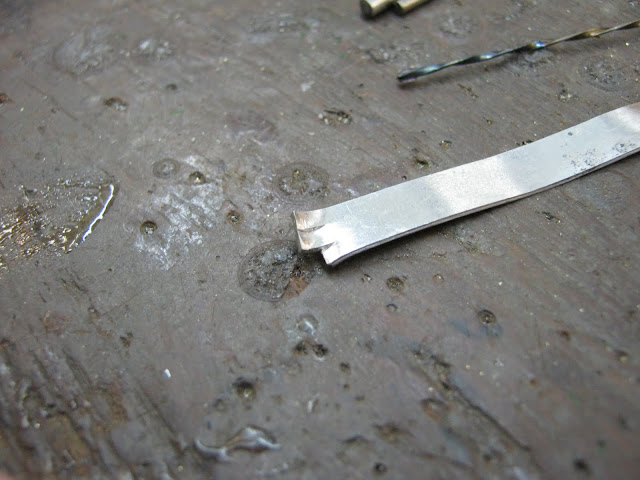
2: The sizing. I cut the required amount out of the shank as per usual and bend it in till its all nice and tight again.
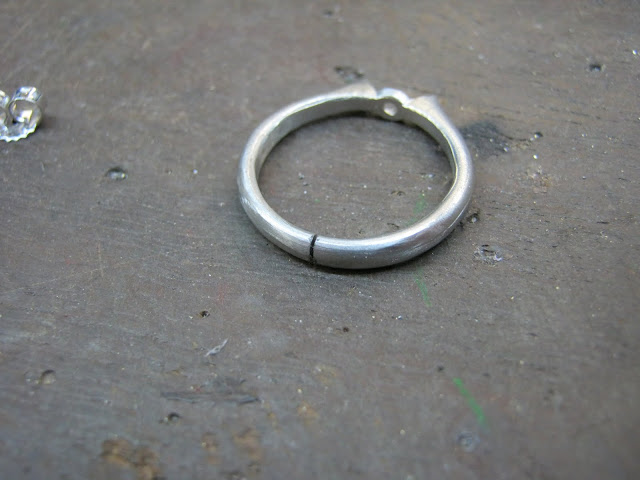
3: preparing the join. I file a V groove about 25% of the way into the join with a square file, right around the join.
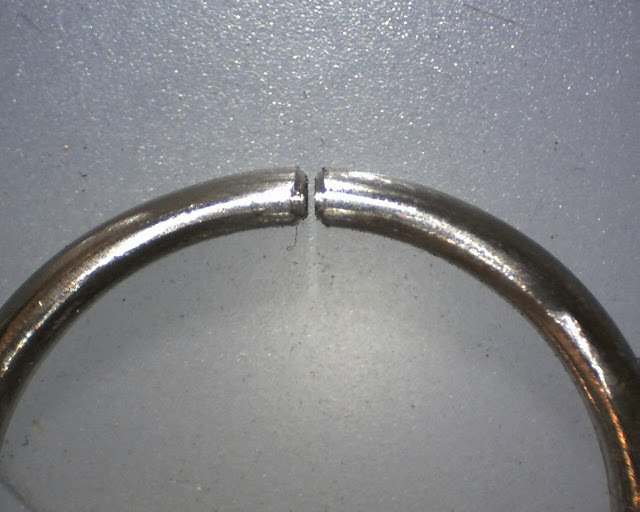
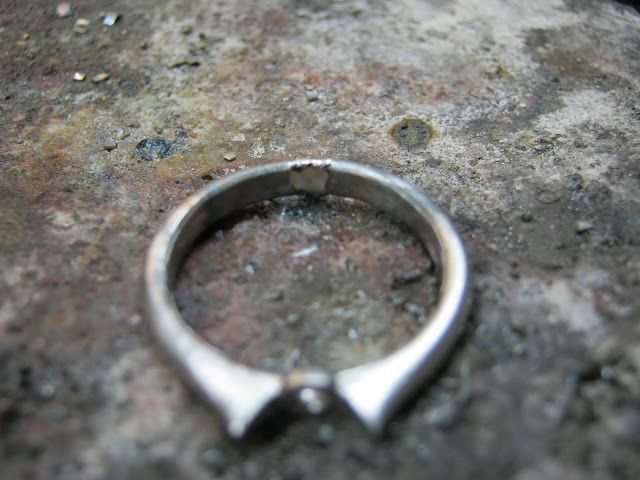
zoomed 16X
CLEANING CLEANING CLEANING time.. refer to beginning of post. This is the time to soak this ring in h2so4 while you prepare the fuse metal.
4: the fuse metal. This platinum must preferably be the same platinum alloy as the ring, you can get away in some cases but preferably try use exactly the same alloy. Mixing cobalt and copper for example wont be an issue but almost anything to try use to fuse with ruthenium based platinums will give you poor bonding and or porosity issues. To ascertain if you are using ruthenium based platinum, try melting a small amount and let it cool, typically it will have a "crytaline" surface.. only use other ruthenium platinum with this.. even then its pot luck with fusing this alloy, unless you buy a laser and work under argon.
Copper platinum work great with fusing, but are generally very soft unfortunately. I find the cobalt platinums to have very good bench and casting qualitys.
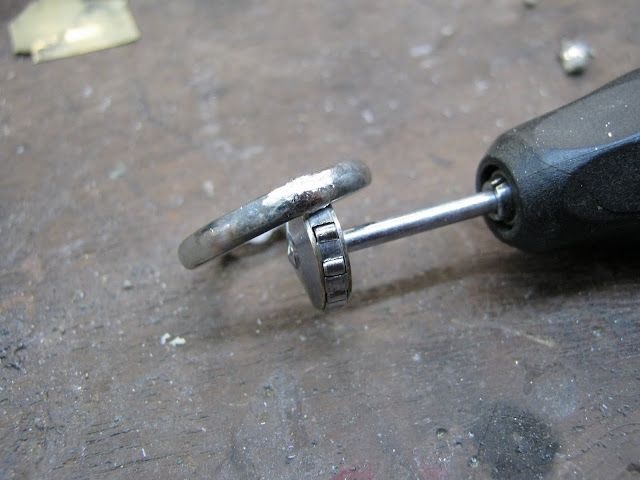
Back on track, roll some of the platinum down the same way you would solder, but leave it heavier at around 0.3mm or so, paper it and CLEAN IT.
then clip of a small section about +- 1mm bigger than your join area right around. you need to fill the v groove you file in step 3 so bigger groove = more metal, use your common sense.. and practice because too much platelet and you wont melt into the join enough and if not enough platelet the fuse will be concave and your shank will be too thin.
Insert this into the CLEAN join area, steam it once more just for kicks :)
DO NOT USE FLUX
DO NOT USE FLUX
REPEAT
DO NOT USE FLUX
5: The fuse (oxy/lpg)
(hahaha yes yes.. i hear the laser boys laughing at me now.. shhhhh back in your cages...)
this is quite different to soldering where all the heat is concentrated close to the join area with the aim of quickly sucking solder into the join, relying on zinc/cadmium etal to flow and bond for you.. (actually those last are in fact why simply soldering platinum quite frequently results in join breaks)
You will need to start out with a very sharp small flame about 4mm of high flow rate blue tip like so

start out by warming the bottom third of the shank to bright white (1300-1500c)(wear protective glasses please)
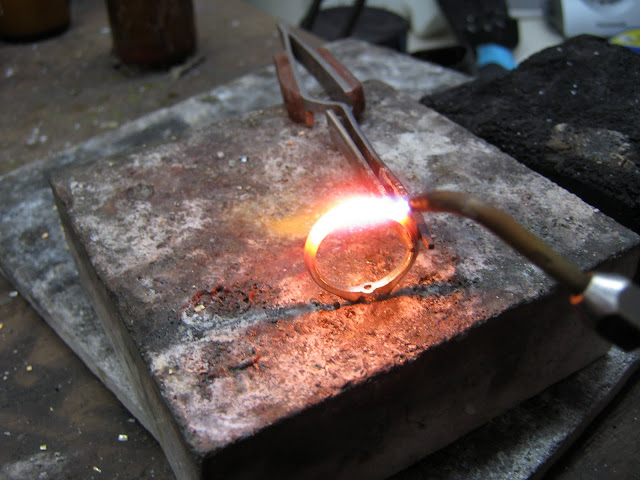
once the lower third to half the shank is so bright and hot that my camera would not even expose the picture (1500 - 1700c), you are ready to fuse..
At this point you have been heating like a regular anneal.. sweeping back and forward with the flame, time to cut the flame back with more oxygen to 1.5 - 2mm and increase the heat (1750c ++)..
the effect here is to melt the platelet into the groove, heat directly from the edge of the platelet with a small concentrated flame so you dont ALSO melt the actual shank.. , melt it toward the shank, let physics sort the rest out.. this will require some practice at first to get the melt right without it dipping into the shank.
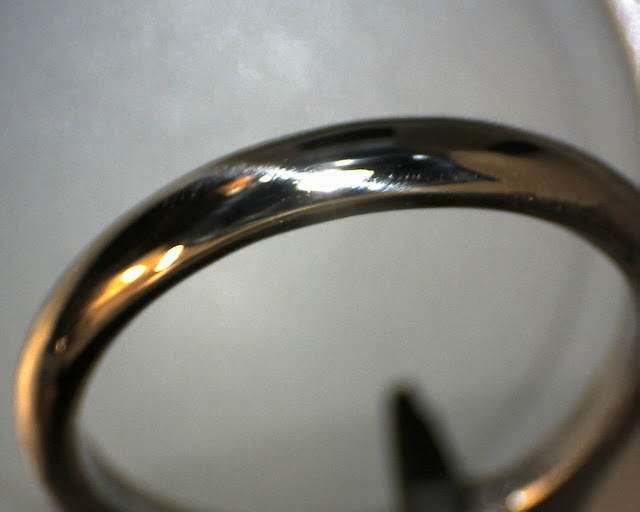
This is what you should see after.
If you observe bubbles, pitting you are most likely working with ruthenium based plat or you have dirt on your material.. or you did not listen and you used flux.. Platinum is a clean metal and wont oxidise in fusing.
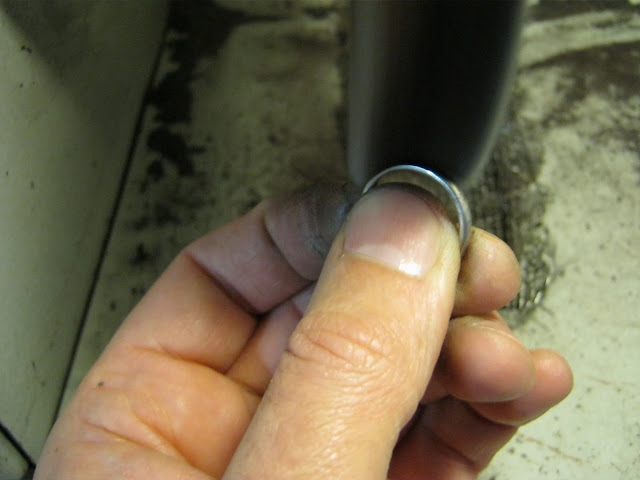
6: Burnish/harden, I like to hammer a fuse and burnish it. I will typically size a platinum job
half a size to a full size too small just so that I can hammer the join area to work harden it, I then burnish the join area as well to eliminate any possible subsurface voids (highly unlikely) and further work harden the area.
7: paper and polish. The subject of finishing and polishing platinum is worth a blog post all on its own , suffice it say
FILE -> 400 grit ->800grit ->1200grit -> 2000grit grey -> 2 grades of polishing compound and this is not yet ready to get a final rouge....
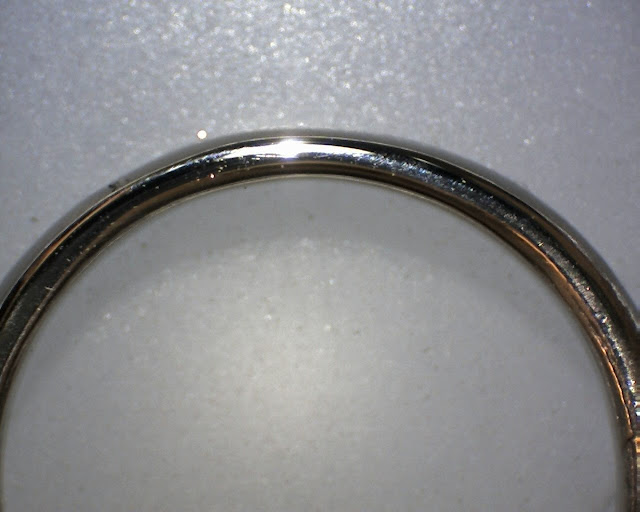
and hopefully you have this.. a seamless join that no amount of polishing will dig into (i hate seeing platinum rings polished and showing the telltale solder seam)
and some close up under 16X of the seam area.. (the proof of the pudding...)
HTH
Regards
Chris
Chris, you are just awesome! LOVE your work, and very much appreciate the time you take to share with everyone. Beckie (RWD)
ReplyDeleteThanks Beckie :)
ReplyDelete