Thursday, 30 August 2012

15ct Tanzanite Make

This was a great job to be involved in, lovely stone too. 

The stone itself is AWESOME!


I opted for a cad result simply because the the sheer volume of metal and angles to access would have been a lemel nightmare. Also using a cad solution allowed me to get s VERY precise fit on that beautiful stone. 

A few consultations had us arrive at a very simple dual band design, after MANY other designs had been drawn up first,

(these were the rejected designs)


so this simple pencil sketch is what landed the job after 4 other CAD drawings featuring crossover sweeps and diamond halos failed to titillate the client :)


A rudimentary Cad representation of the Pen Sketch

And teh stone was modelled PRECISELY, if you know anythign about Tanzanites you will know they are NOT a setters friend, the like to break VERY easily. 

These two images were taken into cad and the dimensions of the physical stone added to extrapolate a perfect stone model


and off to CNC to cut the wax :)


After the mount arrives back on my desk its time for cleanup and preparation and one final fingersize check with the client prior to mounting the stone, the last thing we want is to have to resize this job after setting!


After the client fitted the ring we set about mounting the stone, and start the process by making the while ring ugly again with shellac and other holding polymers.


And finally.. She lives! and awesome beauty!


Wednesday, 29 August 2012

Handmade Threestone Step by Step

A nice job, had to be FAST because its due NOW!

Images are self explanatory, (well to jewellers anyhow) 

Platinum Head, 750Yellow shank set with 2.2ct centre and 0.70ct each side. 

Start with Video of finished piece and follow with step by step make up :)


Thursday, 23 August 2012

My First Monogram Plate.

I have not had much time to play around with engraving so this plate has been a back burner one :)

The monogram started life in Rhino as Chopin Script 
and then edited to blend and overlap before going to Xara for printing
the border similar process, a corner EPS from the web, scaled and rotated to create the border.

Then fun time!


and here is the hires macro video.

Monday, 13 August 2012

Celtic and Ogham Script Wedders

My wife and I had the pleasure to make a lovely
couples dream rings come to life, in time for their dream wedding!

The couple decided an "OFF THE SHELF" solution was NOT what they wanted so they decided to custom make their own wedders with a design special  and unique to them both, and they managed to come up with something rather special.. A mix of Ogham and Celtic script, describing their love and vows for each other!

Happily we were chosen to bring these rings to life.

The design was somewhat complex and of the clients own making, we were furnished with these images in the brief

The ring layouts, Done by client

The profile and Layout of the Gents Ogham Script band


And rather precise spacing and layout of the script


So the work on it began in earnest.. and I mean in earnest! 
Turnaround time was marginal and required high speed courier services between us in Melbourne and the Clients in Hong Kong!

and of course.. Disaster struck.. MISCAST!


The gents Ogham band was a casting fail and had to be hand made  and hand engraved to make the deadline!


And then we had to remanufacture the ladies band too! No errors or issues, but the clients decided they wanted a thicker band to suite the existing engagement ring.. .. NOTHING like pressure when i job is ALREADY overdue! Soo.... Overnight milling, in the mill room till midnight, next day cast and finish.. JUST IN TIME to ship to client for the wedding!

SO! All is well that ends well!  Ladies skip to bottom for pretty ring and wedding pictures if manufacturing videos bore you ;)

Millicent Running the Celtic Bands Ladies
This was filmed in stop motion and sped up to present to client to show progress :)

(groovy soundtracks :) )
  Millicent Running the Gents Celtic Band Millicent Running the Gents Ogham Script Band


OK ladies, pay attention again! 


The video of the completed bands as presented to the clients before Speed Courier pickup to Hong Kong :)


And after a month the clients sent us some images from the event itself!

To the Happy couple, from Caro and Myself..

CONGRATULATIONS!!!!!


(we quote from the emails from the lovely couple)


Andrew

Hi Caro & Chris,

We are back and had a great wedding and time in Czech Republic...

The 2nd ring Portia absolutely loves - it now fits very nicely / looks great with her engagement ring - thanks again!!!
We are both so very happy with how they turned out :)
Being happy with the rings did make the ceremony more relaxed and much more enjoyable for us both (thanks for your help!)
We hope you enjoy the photos and thanks again so much for the help with the rings.

Cheers and best regards,

Andrew (& Portia)


Portia

Hi Chris & Caro

We cannot thank you enough for the rings. Well, we simply could not
have been able to have a perfect wedding without them. The 2nd one of
mine fits perfectly and I proudly show it to my friends. They are
amazed! We know how much extra efforts we had made for us. Will never
forget.

With warmest regards
Portia


From Chris and Caro... to Andrew And Portia..

YOU ARE WELCOME!

What a wonderful experience helping these lovely folk achieve the dream wedding they always wanted!


Kind regards All, 

Chris and Caro


Friday, 10 August 2012

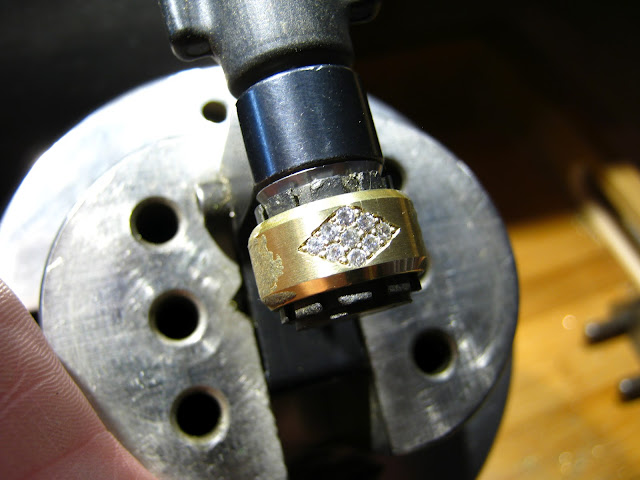
My Next attempt at Pave

Some dual back to back triangular pave. 

I made an error of judgement in terms of the width of the ring VS the size of the stones.. but managed to wing my way around it ;)

Images follow logically after video :)


And added this segment after :)


and this clip with it :)


Thursday, 9 August 2012

Square Setting

Had some fun with this.. set three just for practice.. then.. as usual.. ran with the idea and engraved it as well ;) (see video at end of post), images follow logically.

Tools Used,

Lindsay Airgraver
90 degree, 30 degree, flat and a beading tool,
1.5mm drill, 2.8mm flame burr, 3.0mm setting burr
3 x 3mm CZ, 1x Bunnings brass lug.


Drill the holes (in retrospect i should have measured this, but I didn't plan to engrave it up as a single piece at this point :) )
Open with Flame and setting burr to seat stone, then precut the bead edges. 
Deburr with stone setting burr and place Gem. 
use 30 degree to cut a bead and press over stone 
 Use a beader to round off the beads
use the 90 degree and flat gravers to cleanup and edge the borders 
repeat X 3 

THEN.. decide you kind like it, even if its not even, so carve it up with walking leaf and milligrain ;)


Tuesday, 7 August 2012

First Attempt at Pave

The ring blanks I am using are from Bunnings Hardware, COPCAL seal rings, 60 cents per six pack, very cheap but not useful with that large angle on them, so some machining with lathe was required first. Images follow logically after video :)